Table of Contents
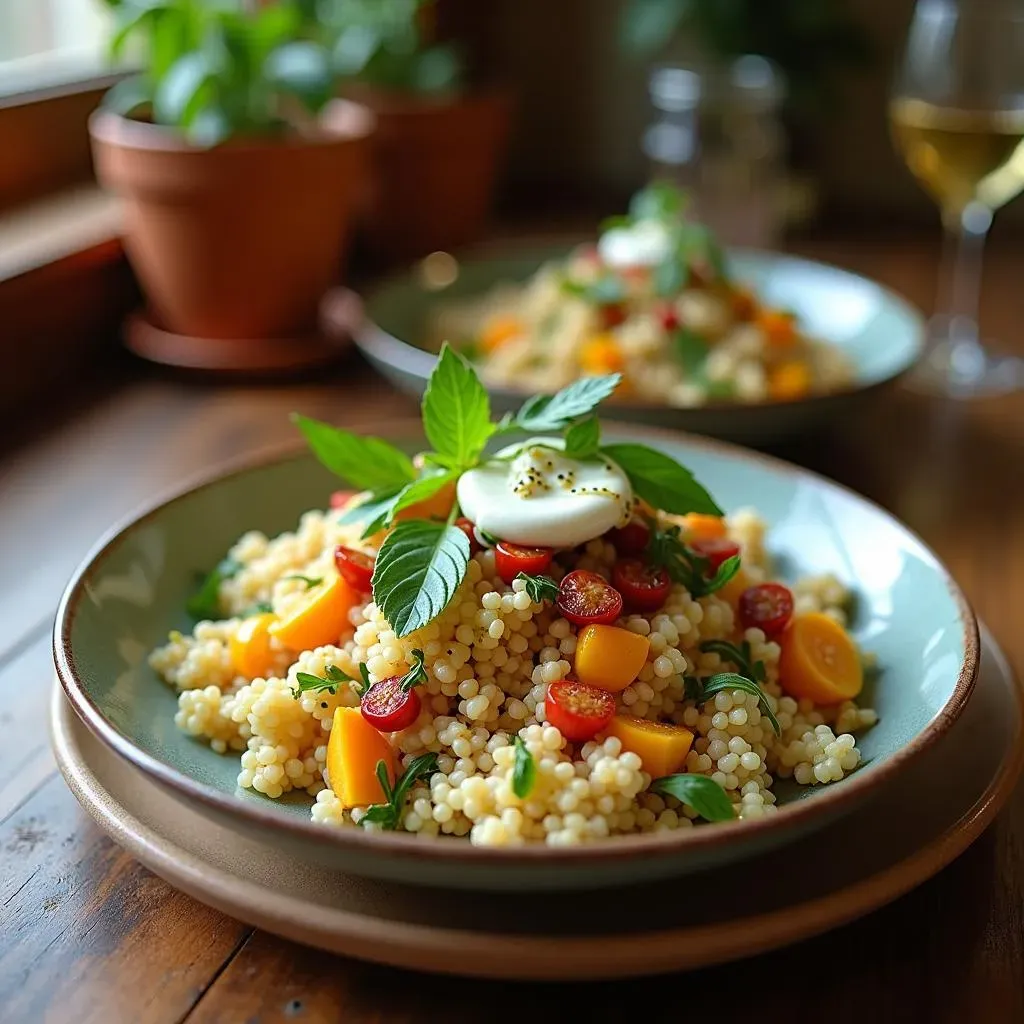
Ever find yourself craving a dish that's both hearty and healthy? Well, I've got just the thing: Israeli couscous salad with roasted vegetables. This isn't your average side dish; it's a flavor party in a bowl, combining the satisfying chew of Israeli couscous with the sweet, smoky taste of roasted veggies. Think of it like this: plump pearls of pasta mingling with tender, caramelized vegetables. It's like a Mediterranean vacation without the plane ticket. We're talking about a dish that’s as good warm as it is cold, making it perfect for a quick lunch or a potluck showstopper. Ready to get cooking? This article will guide you through each step, from roasting the vegetables to whipping up a tangy vinaigrette. We'll break down how to make this vibrant israeli couscous salad roasted vegetables creation, ensuring you get it just right every time. So, let's get started and bring this delicious dish to life!
Roasting Vegetables for Israeli Couscous Salad
Roasting Vegetables for Israeli Couscous Salad
Choosing Your Veggies
let's talk veggies. For this Israeli couscous salad, you want a mix that gives you both color and flavor. I'm a big fan of bell peppers – red, yellow, orange, the whole rainbow – because they get super sweet when roasted. Zucchini and yellow squash are also great; they get nice and tender. Don't forget red onion; it adds a bit of bite. And cherry tomatoes? They burst in the oven, releasing all that juicy goodness. I like to cut everything into similar-sized pieces, about an inch or so, so they cook evenly. Think of it as building a tasty, colorful mosaic.
Now, don’t be afraid to experiment. If you have some eggplant kicking around, throw it in! Asparagus can also be a great addition, just keep an eye on it, as it cooks faster. The key is to use vegetables that you like, and that roast well. I once tried roasting some broccoli florets, and while they were tasty, they got a little too crispy for my liking in this salad. So, you might want to skip the broccoli and stick to the options that get more tender and juicy. The best part? You can adjust the veggies based on what’s in season, making it a dish you can enjoy year-round.
Vegetable | Why it's Great | Roasting Notes |
|---|---|---|
Bell Peppers | Sweet and colorful | Cut into 1-inch pieces |
Zucchini/Squash | Tender and mild | Cut into 1-inch pieces |
Red Onion | Adds a bit of bite | Cut into wedges |
Cherry Tomatoes | Bursting with juice | Leave whole or halved |
The Roasting Process
Alright, let's get roasting! First things first, preheat your oven to 400 degrees Fahrenheit. I like to line a baking sheet with parchment paper, it makes cleanup a breeze. Toss your chopped veggies in a large bowl with olive oil, salt, and pepper. I’m pretty generous with the olive oil, it helps them get that nice caramelization. Make sure everything is evenly coated. Then spread the veggies in a single layer on the baking sheet. Don't overcrowd the pan, if you do, they’ll steam instead of roast, and we want that lovely roasted flavor.
Now, into the oven they go! Roast for about 40 to 45 minutes, or until they are tender and have some nice brown edges. Halfway through, I like to give them a little toss to ensure even cooking. Keep an eye on them, as oven times can vary. You’ll know they’re ready when a fork easily pierces through them. Once they’re done, take them out and let them cool slightly while you get the couscous ready. The aroma alone is going to make your kitchen smell incredible; that's the magic of roasting.
Cooking the Perfect Israeli Couscous
Cooking the Perfect Israeli Couscous
Toasting the Couscous
Now, while those veggies are getting all cozy in the oven, let's move on to the star of our salad: the Israeli couscous. This isn't your regular couscous; it's bigger, with a delightful pearl-like shape and a slightly chewy texture. The secret to getting it just right? Toasting it! It’s a simple step that adds a nutty depth of flavor. Grab a medium pot and drizzle in some olive oil. I'd say about a tablespoon or so. Heat it over medium heat and then toss in your dry couscous. Stir it around for about 3 to 5 minutes, until it starts to turn a light golden brown and smells wonderfully toasty. This step is a game-changer, trust me.
Toasting the couscous might seem like an extra step, but it really makes a difference. It enhances the flavor and gives it a more complex taste profile. Think of it like toasting nuts before adding them to a recipe; it brings out their natural richness. I remember once skipping this step because I was in a hurry, and the couscous just tasted kind of bland. Lesson learned! So, don’t rush it; take the extra few minutes to toast it properly. It's those small details that elevate the dish from good to great.
Step | Action | Why it Matters |
|---|---|---|
1 | Heat olive oil in pot | Prepares the pot for toasting |
2 | Add dry couscous | The main ingredient |
3 | Toast for 3-5 minutes | Enhances flavor and texture |
Cooking with Broth
Once your couscous is nicely toasted, it's time to cook it. Instead of using water, I highly recommend using vegetable broth. It adds an extra layer of flavor that water just can't provide. Pour in the broth, making sure it covers the couscous by about an inch. Bring it to a boil, then reduce the heat to low, cover the pot, and let it simmer for about 10 to 12 minutes, or until all the liquid is absorbed and the couscous is tender. Don’t peek during the simmering process, as you want to let the steam do its magic. It’s like giving it a little steam bath to plump up perfectly.
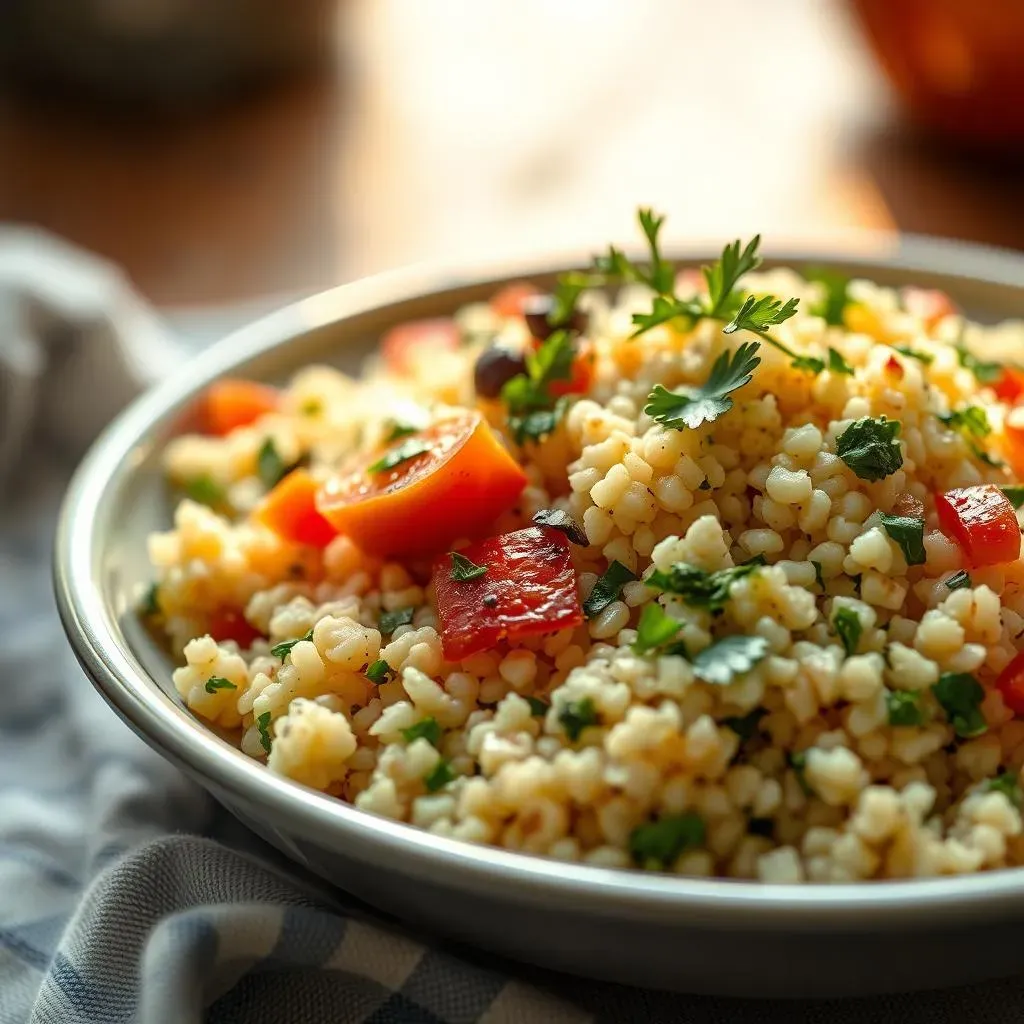
After the couscous is cooked, I like to fluff it with a fork. This helps separate the grains and prevents them from sticking together. It also allows any remaining steam to escape, which is key for the texture we're aiming for in the salad. If you find that there's still a little liquid left, just drain it off with a fine-mesh sieve. You don’t want soggy couscous in your salad. And that's it! Set the couscous aside to cool slightly while you prepare the vinaigrette. You're one step closer to creating something delicious!
Fluffing and Cooling
Fluffing the couscous is not just about aesthetics; it's about making sure every grain is separate and ready to soak up that delicious vinaigrette. After you’ve let it sit, grab a fork and gently toss it around. This prevents it from clumping and ensures an even distribution of dressing later on. It's like giving each tiny pearl its own space to shine. Letting the couscous cool down a bit is also crucial. If you toss it with the dressing while it’s still hot, it can get a bit mushy. We want a salad with great texture, not a mushy mess.
I usually spread the cooked couscous out on a large plate or a baking sheet to speed up the cooling process. It's like giving it some room to breathe. This step is often overlooked, but it makes a huge difference in the final product. Once it’s cooled down to about room temperature, you’re ready to move on to the next stage. So, go ahead, give it a fluff, let it cool and get ready for the delicious vinaigrette!
Making a Zesty Vinaigrette for the Salad
Making a Zesty Vinaigrette for the Salad
The Base Ingredients
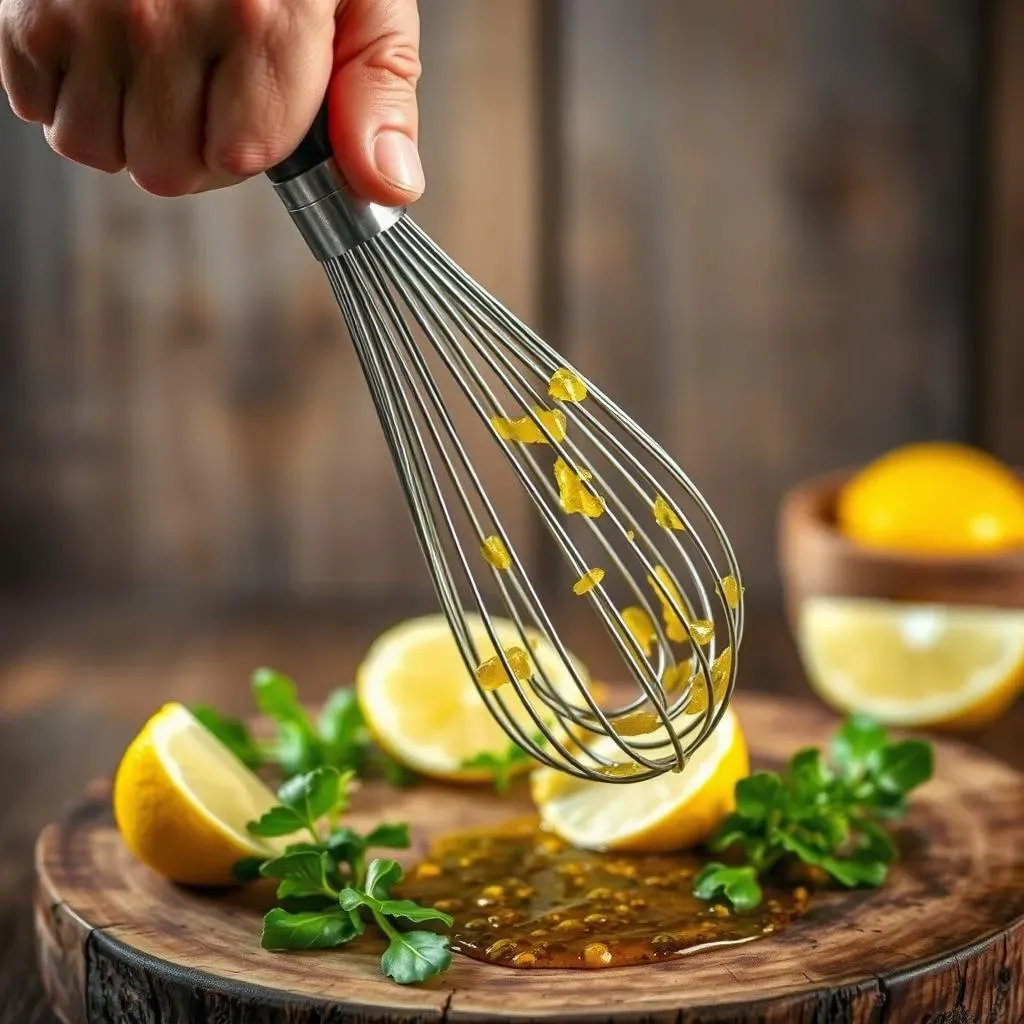
Alright, let's talk vinaigrette – the unsung hero of any great salad. For this Israeli couscous salad, we're going for a bright, zesty flavor that complements the roasted vegetables and couscous perfectly. The base of our vinaigrette starts with a good quality olive oil. I like to use extra virgin olive oil for its rich flavor. Then, we'll add balsamic vinegar, which brings a lovely tang and a touch of sweetness. Don't skimp on the vinegar; it's what gives the dressing its zing! A bit of Dijon mustard helps emulsify everything and adds a little extra kick. Finally, a squeeze of fresh lemon juice brightens it all up. It’s like a little sunshine in a bowl.
I remember one time, I was out of Dijon mustard, so I tried using some regular yellow mustard instead. Let me tell you, it wasn’t the same! The Dijon has a certain sharpness that really elevates the vinaigrette. So, while you can experiment with other ingredients, I recommend sticking to Dijon for this recipe. The key here is balance; you want the acidity of the vinegar and lemon to play nicely with the richness of the olive oil. It's like conducting a mini orchestra of flavors, making sure each one gets its moment to shine.
Ingredient | Purpose | Notes |
|---|---|---|
Olive Oil | Base of the dressing | Use extra virgin for best flavor |
Balsamic Vinegar | Adds tang and sweetness | Don't be shy with it! |
Dijon Mustard | Emulsifies and adds kick | Essential for the right flavor |
Lemon Juice | Brightens the flavor | Freshly squeezed is best |
Mixing and Tasting
Now, for the fun part – mixing the vinaigrette! In a small bowl, whisk together the olive oil, balsamic vinegar, Dijon mustard, and lemon juice. I like to use a small whisk, but a fork works just as well. Whisk everything together vigorously until it's well combined and slightly thickened. You'll notice that the dressing will go from looking separated to becoming smooth and creamy. This is what we call an emulsion, and it’s what gives the dressing its lovely texture. Don't be afraid to get your arm workout in! This step ensures that the flavors blend perfectly.
Once you've got it all whisked up, give it a taste. This is where you can adjust the flavors to your liking. If it’s too tangy, add a little more olive oil. If it needs more of a kick, add a bit more lemon juice or a pinch of salt. The beauty of making your own vinaigrette is that you can customize it to your preference. I sometimes add a clove of minced garlic or a pinch of dried oregano for a little extra something. So, taste, adjust, and make it your own. It’s all about finding that perfect balance.
Assembling and Serving Your Roasted Vegetable Israeli Couscous Salad
Assembling and Serving Your Roasted Vegetable Israeli Couscous Salad
Combining the Ingredients
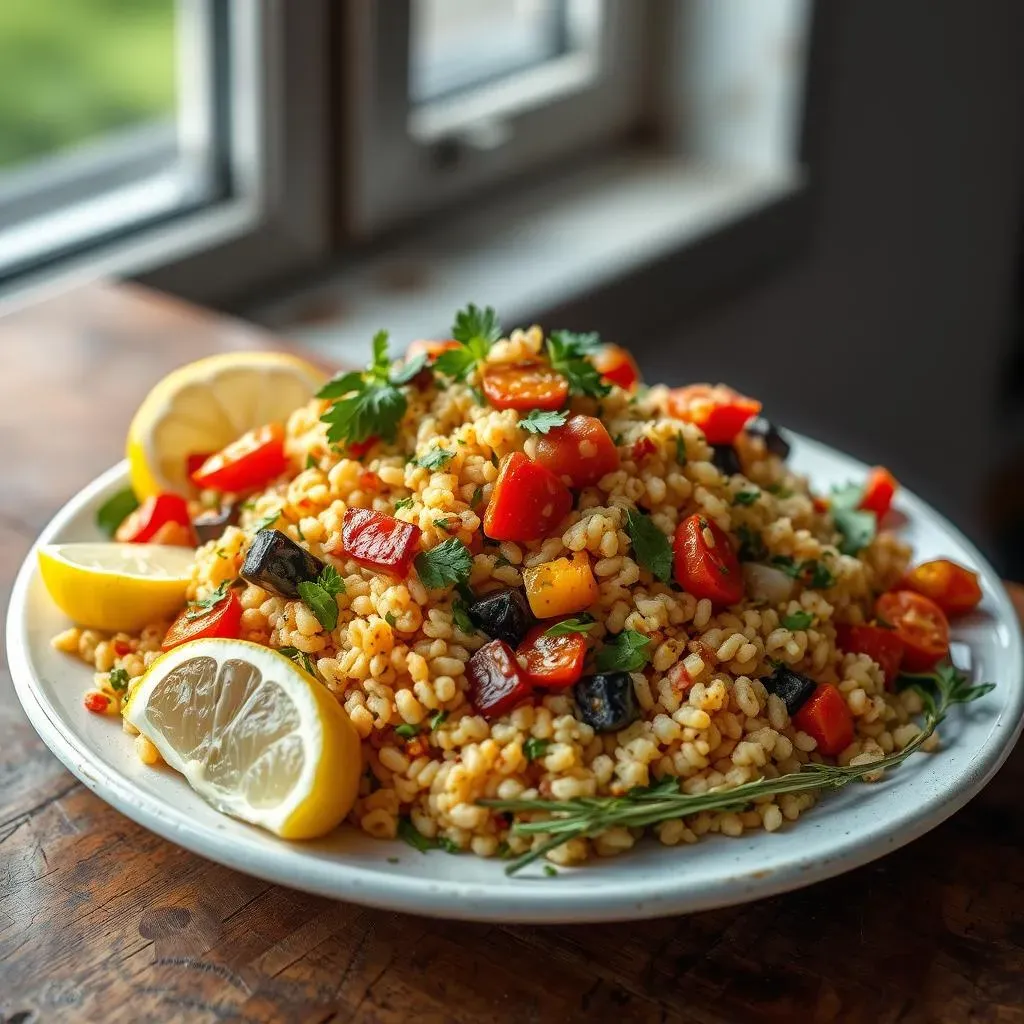
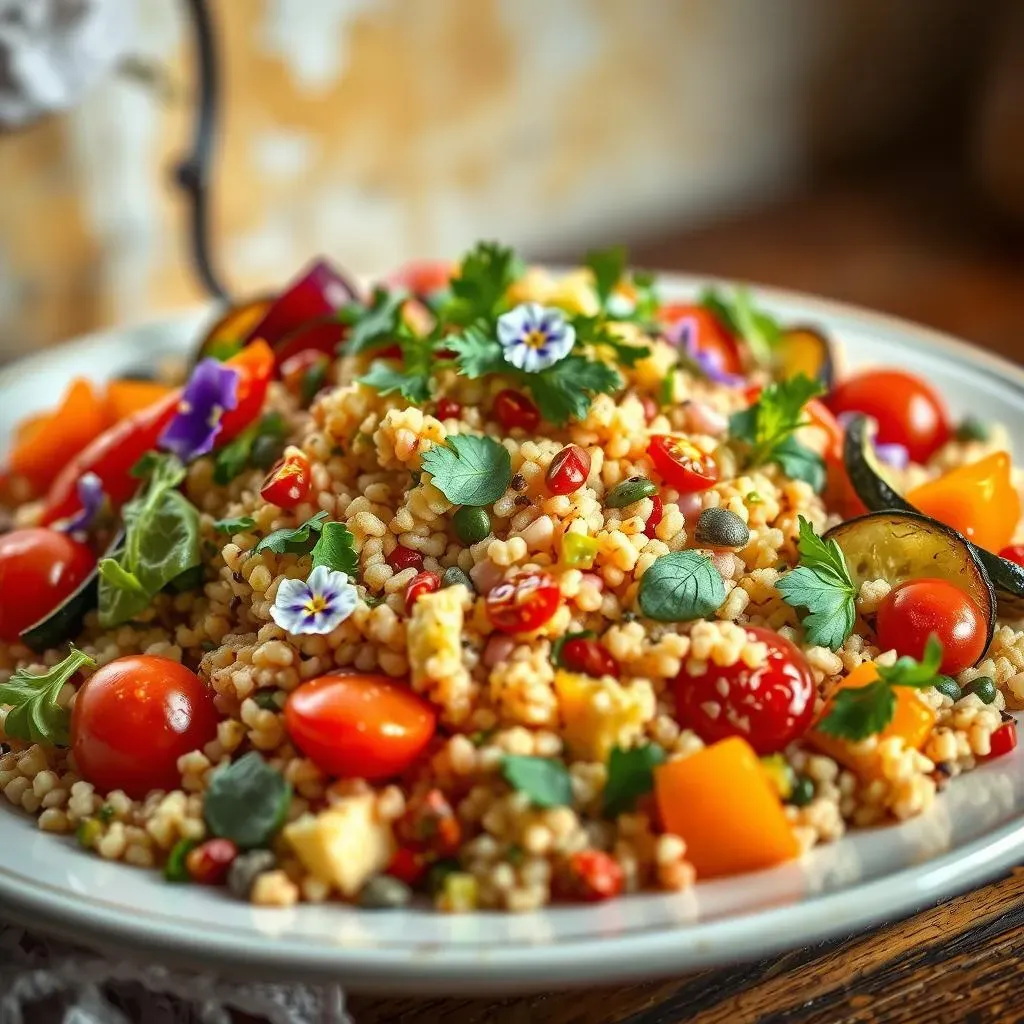
Alright, the moment we've been waiting for—assembling our masterpiece! Grab a large bowl, the bigger the better, because we're about to combine some seriously delicious stuff. Gently toss in your roasted vegetables, making sure you get every last bit of that caramelized goodness. Then, add the cooked and cooled Israeli couscous. It's like a reunion of flavors, the sweet roasted veggies meeting the nutty couscous. Now, pour that zesty vinaigrette over everything. Don’t be shy; you want every bite to be coated in that delicious dressing. I like to use a couple of large spoons or spatulas to gently toss everything together, making sure it’s evenly distributed. Think of it as a careful dance, ensuring all the ingredients get to know each other.
One tip I’ve learned over time is to add the vinaigrette gradually. Start with about two-thirds of it, toss everything together, and then add more if needed. This way, you can control the level of dressing and avoid having a soggy salad. You want it to be nicely coated, not swimming in dressing. It’s a bit like seasoning a dish; you can always add more, but it’s hard to take away. I remember one time I poured all the vinaigrette at once, and the salad ended up being a bit too wet. Lesson learned: go slow and steady. This way, you’ll achieve the perfect balance of flavors and textures.
Ingredient | Action | Why it Matters |
|---|---|---|
Roasted Vegetables | Add to the bowl | Provides sweetness and depth |
Cooked Couscous | Add to the bowl | Offers a chewy texture |
Vinaigrette | Pour over the salad | Brings all the flavors together |
Serving Suggestions
Now that our Israeli couscous salad is all dressed up and ready to go, let’s talk about serving it. This salad is incredibly versatile. It’s fantastic as a side dish, pairing well with grilled chicken, fish, or even a hearty veggie burger. I love bringing it to potlucks because it’s always a crowd-pleaser. It’s also great as a light lunch all on its own. The best part? It tastes just as good warm as it does cold, so you can enjoy it straight away or pack it up for later. It’s a true culinary chameleon, adapting to whatever occasion you throw its way.
If you want to elevate it even further, consider adding some crumbled feta cheese on top. The salty, tangy feta pairs beautifully with the sweet roasted vegetables and zesty vinaigrette. Some chopped fresh herbs, like parsley or mint, can also add a touch of freshness. I sometimes like to add a sprinkle of toasted pine nuts or slivered almonds for a little extra crunch. It’s all about layering those flavors and textures to create a truly memorable dish. So, whether you’re serving it as a side, a main, or bringing it to a party, you’re sure to impress with this vibrant and flavorful salad.
Customizing Your Salad
The beauty of this recipe is that it's incredibly customizable. Feel free to experiment with different vegetables, herbs, and even protein sources. If you're a fan of chickpeas, toss some in for added protein and fiber. Grilled halloumi cheese also works great, adding a salty, squeaky element that’s hard to resist. You can also switch up the vinaigrette by adding different herbs, spices, or even a touch of honey for sweetness. It's like having a blank canvas; you can create a new masterpiece every time you make it. Don't be afraid to get creative and make it your own. After all, the best recipes are the ones that reflect your personal taste and style.
Wrapping Up Your Roasted Vegetable Israeli Couscous Salad Adventure
So, there you have it – a vibrant and delicious Israeli couscous salad with roasted vegetables that's both satisfying and good for you. We’ve covered everything from roasting the vegetables to cooking the couscous and making that zesty vinaigrette. This dish isn't just a recipe; it's a template. Feel free to mix and match your favorite veggies, add some protein like chickpeas or grilled chicken, and adjust the dressing to your liking. Whether you’re serving it warm for dinner or cold for lunch, this salad is sure to be a hit. Now, go ahead and impress your friends and family with your newfound culinary skills. Enjoy every bite!